
.png)
Prequisites
- Oracle Linux 8.7
- Package Oracle Database 19c (LINUX.X64_193000_db_home.zip)
Step Installation
- Check IP Address and set Hostname and List hosts
# ifconfig
# hostname
# nano /etc/hosts
192.168.170.137 oracleDB2 oracleDB2.localdomain
# nano /etc/hostname
oracleDB2 

-Disable Selinux and Firewall
# vi /etc/selinux/config
SELINUX=disabled

# systemctl status firewalld
# systemctl stop firewalld
# systemctl disable firewalld
# systemctl status firewalld


- Set up the preinstall package which is necessary for Oracle 19c. This
package comprises User & Groups which are necessary for Oracle. It
adjusts kernel parameters suggested by Oracle and installs other necessary
packages.
# yum install -y oracle-database-preinstall-19c

- Choose a password for the Oracle user.
# passwd oracle
Changing password for user oracle.
New password:
Retype new password:
passwd: all authentication tokens updated successfully.
- Create directory home for database and set permission.
# mkdir -p /u01/app/oracle/product/19/db
# mkdir -p /u01/orainstall
# chown -R oracle:oinstall /u01
# chmod -R 775 /u01/

- Create Profile Database.
# su - oracle
$ vi .profile_db
--- ADD THIS ---
ORACLE_HOSTNAME=oracleDB2; export ORACLE_HOSTNAME
ORACLE_UNQNAME=orcl2; export ORACLE_UNQNAME
ORACLE_BASE=/u01/app/oracle; export ORACLE_BASE
ORACLE_HOME=$ORACLE_BASE/product/19/db; export ORACLE_HOME
ORACLE_SID=orcl2; export ORACLE_SID
ORACLE_HOME_LISTNER=$ORACLE_HOME export ORACLE_HOME_LISTNER
ORACLE_TERM=xterm; export ORACLE_TERM

BASE_PATH=/usr/sbin:$PATH; export BASE_PATH
PATH=$ORACLE_HOME/bin:$PATH:$ORACLE_HOME/OPatch:$BASE_PATH; export PATH
LD_LIBRARY_PATH=$ORACLE_HOME/lib:/lib:/usr/lib; export LD_LIBRARY_PATH
CLASSPATH=$ORACLE_HOME/JRE:$ORACLE_HOME/jlib:$ORACLE_HOME/rdbms/jlib; export CLASSPATH

TMP=/tmp; export TMP
TMPDIR=$TMP; export TMPDIR
----- END -----------------

## To automatically set up ".profile_db" file, add it to .bash_profile file.
$ vi .bash_profile
. .profile_db


- Add Package Oracle Database you've Download for installation to
/u01/orainstall folder. We’re going to unzip the $ORACLE_HOME index of that
ZIP by following the below instructions. In order to eliminate problems
regarding folder authorisation during unzipping, give folder authorisation and
ownership from the root user to the Oracle user. Then, switch to the Oracle
user and run the unzip command.
# cd /u01/orainstall/
# ls -lthr
# chmod 777 LINUX.X64_193000_db_home.zip
# chown oracle.oinstall LINUX.X64_193000_db_home.zip
# ll
# su - oracle
$ cd /u01/orainstall/
$ unzip LINUX.X64_193000_db_home.zip -d /u01/app/oracle/product/19/db/

Installing Database.
- Now, we'll start installing database software through the graphical interface
by running installation interface.
# su - oracle
$ cd /u01/app/oracle/product/19/db

## Set X server for Graphical Interface while installing Databases
$ export DISPLAY=192.168.170.1:0.0
$ ./runInstaller
- There is some error if we run the installer, [ IN-08101 ]. This is because Oracle Database 19c is compatible with Oracle Linux 7 so we need to change the value in cvu_config

 - There is the interface, move on with "Set Up Software Only" on the first screen.

- Select "Single instance database installation".

solution for this issue :
// Solution Temporary
# export CV_ASSUME_DISTID=OEL8.1
OR
// Solution Permanent, Uncomment and set the value
# vi $ORACLE_HOME/cv/admin/cvu_config
CV_ASSUME_DISTID=OEL8.7
- Select "Single instance database installation".

- Select "Enterprise Edition".

- Check whether your Oracle Base Directory is correct or not.

- Approve the Inventory Directory.

- Adjust the operating system groups as in the picture below.

- Select that option for the scripts that need to run during the installation to run automatically and write root user’s password. This option is not obligatory, you may also write manually the scripts needed during installation. We don’t recommend using this automation in the production environment but since we’re creating a test environment in this guide, we’re going on with automatic configuration.

- If you didn’t make any mistakes during preparation phase or there isn’t something that may prevent Oracle installation in your system, you'll automatically see that summary screen below.

- If you see the error/warning screen, you should approach every error seperately and run “Check Again”. You can ‘ignore’ most of the ‘warning’ errors but ‘failed’ errors certainly must be handled before starting. (except some bug situations). Those errors you receive here may be due to kernel parameters or swap size.

Upon clicking "Install", software installation will be started as in the picture below.

You’ll see a notification regarding that scripts which are needed for root during installation will be run. Continue installing by clicking "Yes".

On the last screen, which tells the installation is completed successfully, click "Close" and finish the installation.

Creating a Database with DBCA
- Now, you have your Oracle database software installed and you can create a new database whenever you want. Run the interface "DBCA - Database Configuration Assistant" from Terminal.
$ dbca

- Select "Create a database".

- Select "Advanced Configuration".

- Select "General Purpose or Transcation Processing" template.

- On this screen, you should determine name and sid value of your database. We chose ‘orcl’ for both. Continue without selecting “Create as Container database”. It’s a whole different technology which we’ll tell you about in another post. In this guide, we’re creating a classical database architecture.


- If you choose 'Enable archiving', your database will be in 'Archivelog' mode. Redo log files are where action records of database are held and if this mode is on, backups of redo log files will be kept in FRA with the name Archivelog. "FRA - Fast Recovery Area" is where files such as archivelog, flashbacklog and backup are kept. Continue without choosing those options for recovery. We'll examine them in detail in 'Backup & Recovery' posts.

You need to set up a 'Listener' for the users to connect with the database. You can set up "NETCA - Network Configuration Assistant" manually or configure it automatically in this phase. We're using automatic configuration in this guide.

- 'Oracle Database Vault' and 'Oracle Label Security' won't be used in this guide since they're about security.

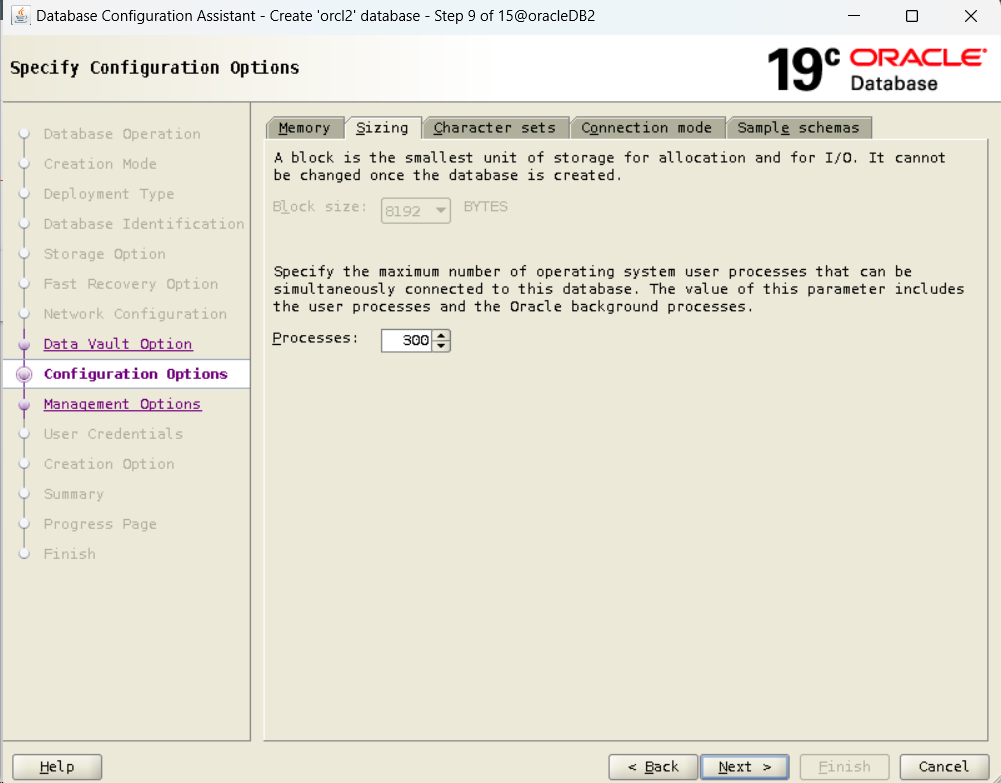
- In memory settings, we’ll leave sharing for SGA & PGA sizes to Oracle by choosing automatic management. We’ll examine SGA and PGA in detail in our post on Oracle Architecture. Determine the size so that it won’t be larger than two third of the physical RAM size of your server.

- In memory settings, we’ll leave sharing for SGA & PGA sizes to Oracle by choosing automatic management. We’ll examine SGA and PGA in detail in our post on Oracle Architecture. Determine the size so that it won’t be larger than two third of the physical RAM size of your server.
- Adjust as in the picture below.
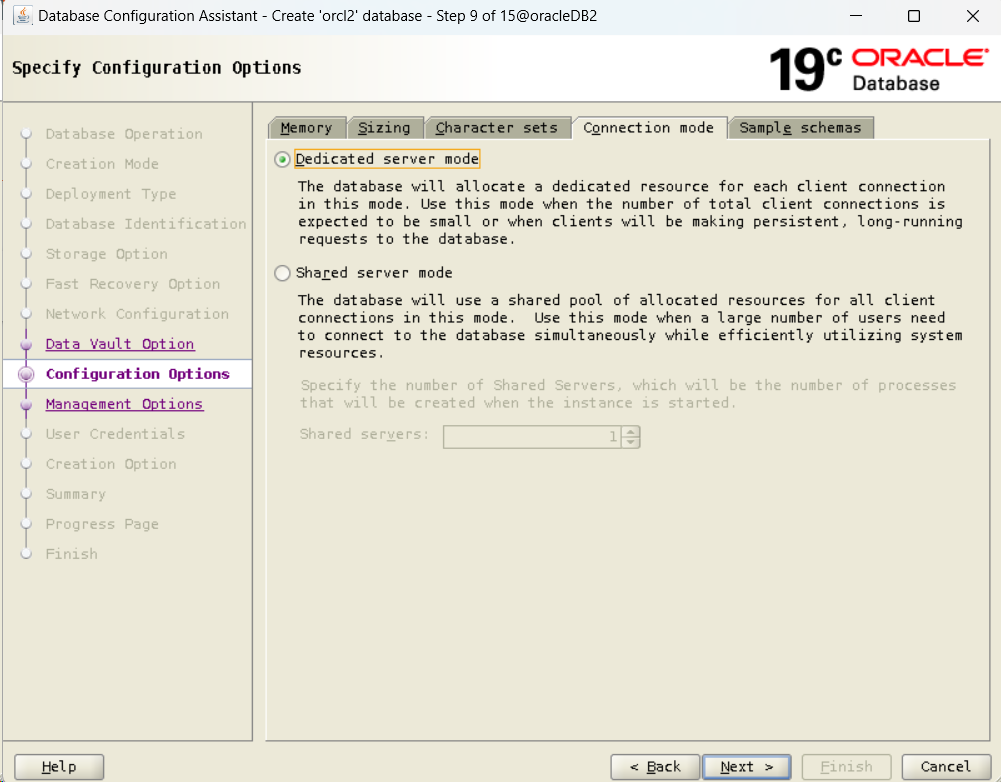
- "Shared Server & Dedicated Server" is also about architecture and will be discussed later. Continue by choosing "Dedicated server mode".
- Select "Add sample schemas to the database" and add the HR schema you'll work with.

- Adjust as in the picture below in order to configure "Enterprise Manager".

- Choose a password for the 'SYS' and 'SYSTEM' users of your database. If you're going to use the same password for both, you may continue with the below option. YES


- Select "Create database".

- You'll see the summary screen as in the picture below if there is no error/warning in your system that prevents creating a database. Start installation by clicking "Finish".

- Installation in progress...
- "Shared Server & Dedicated Server" is also about architecture and will be discussed later. Continue by choosing "Dedicated server mode".
- Select "Add sample schemas to the database" and add the HR schema you'll work with.
- Adjust as in the picture below in order to configure "Enterprise Manager".
- Choose a password for the 'SYS' and 'SYSTEM' users of your database. If you're going to use the same password for both, you may continue with the below option. YES
- Select "Create database".
- You'll see the summary screen as in the picture below if there is no error/warning in your system that prevents creating a database. Start installation by clicking "Finish".
- Installation in progress...

- Database installation is completed successfully. Copy the URL in the EM Database Express URL. Exit GUI by clicking "Close".

- Paste the URL you've copied into the address bar and log in with the password you've chosen for 'SYS' in the EM website.

- You can learn about database statistics, Top SQLs and performance from the panel you see in the picture below.

- Now, let's try running some queries by connecting to your database with SQLPlus.

$ sqlplus / as sysdba
SQL> select open_mode from v$database;
SQL> select banner from v$version;
- Try running query on the HR scheme you'll use in your applications.
SQL> select first_name, last_name from hr.employees where rownum < 4;

Thanks 🙏


.png&description=How to Install Oracle 19c Single Instance Database in Oracle Linux 8)
0 Comments